Pages

Thursday, September 21, 2017

Our Doll Kitchen

The kitchen in our dollhouse has taken many forms over the years.
This was the first version.  This was back in 2012, not long after
Our first 2 dolls, Grace and Emma, came to live with us.

Then my husband helped me construct this stove.

The addition of the stove was a huge improvement.
Sophie was 8 and she loved her doll kitchen.

After the new dollhouse was built, the kitchen was updated again.

Most recently, the kitchen looked like this.
A few months ago I found the maple drop-leaf table.
More recently, I found the wood cabinet in the center.  
This wood addition made me think about redoing 
our kitchen in a more traditional style.

Our Molly is the one who spends most of her time 
in the kitchen, so I looked at 1940's kitchen styles.
This is actually from the 1930's, but I loved it.

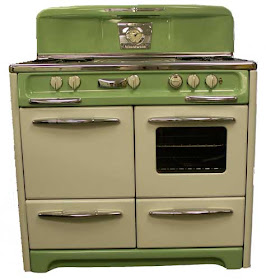
Then I found this image of a 1940's stove.

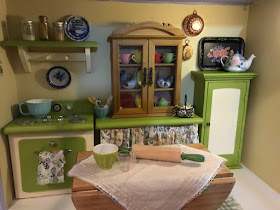
AND, here is our stove now.

The wood cabinet that started all this.

I love my egg basket!!
I made these eggs from polymer clay.

I had purchased this fabric months ago, just because I loved it.
Ever since, I wondered what I would use it for.
When I rummaged through my fabric and saw it, I knew!
These butterflies would be for the new kitchen.

A matching dish towel.

I made this rug out of some coordinating fabric.
I will have a tutorial for this rug at the bottom of this post.

BEFORE and...

AFTER.
Our new kitchen!


RUG TUTORIAL
For the rug I cut a piece of fabric about 12 inches long
and 8 inches wide. I turned down a
 single fold and hemmed the long sides.
Then I lay my fabric on a hard surface and 
using a pin I start to scrape at the rough edge.

Just continue pulling out strands of fabric until you have a fringe.

VOILA!

I used this same technique to make my dish towel.


Friday, September 15, 2017

Some great new additions!

I am always keeping my eyes open for something new for the dolls.
Here is what I've found most recently.
First off I found this Our Generation Woodworking Set.
Martin really needed some tools for his treehouse project,
so when I saw this I knew it would be coming home with me.

The set comes with a birdhouse project, hammer, nails,
paint can, brush and saw.

The lid comes off the paint and the brush fits inside.

The jar of nails and screws does not open, but a cute addition.

Martin used almost all these new tools for his treehouse.

Next I found this My Life Grill Set.
It was on sale for $5.00!  How could I NOT get it?

It comes with everything above.

There are 2 red burger baskets.

A Spatula and Tongs.

Burger patties and shrimp kabobs.

There are 2 napkins for the baskets.  The burgers are also completely
stackable, so everyone gets just what they want on their burger.

Next I found this little cabinet at a thrift store.  

It has made me think about
Redoing our kitchen to be a little more traditional.

Then I found this little china plate.

It is apparently a curio from the Biltmore Estate.

It will make a great addition to our mini plate collection.

As if I hadn't already found enough great stuff.  
I came across a bag of doll clothes.  In the bag was this dress.

Elle really likes the blue print.

And this doll dress. 
I love the detailed embroidery.
Does this look familiar?

It should, it's an American Girl Doll Gwen sundress!
Can you believe it?!?
Jayla looks beautiful.

Wednesday, September 13, 2017

Sock dress tutorial


Back when we first started this blog I had a post sharing 
clothes we had made or remade. 

On the post above I had shared a couple sock dresses.  
I just got a request to do a tutorial, so here it is!

NOTE: These sock dresses are NOT easy to put on.
Little girls will need help.

You'll need a patterned knee sock.

Lay your doll flat and lay the sock over her.
The top of the sock should be about where
 you want the bottom hem to reach.

Cut off the sock about at her cheekbone.

Lay the sock on your doll and cut a tiny hole just below her armpit.

Using this hole cut a slit about 1"

Pull the sock on from her feet upward.
Then insert her arms in the armhole/slits.

DONE!
That easy.
The sock will naturally roll up to make the collar.

NOTE:To really finish this off you can whipstitch 
around the neck and armholes. 


SO what do you do with the toe of the sock?

This is a great video tutorial for that toe!

I've cut openings in the toe and cut out the heel.

Pulled on the sock and cut a deep V in the top of the sock

Pulled those ends around and tied them behind her neck.

Now I have a dress and swimsuit!

So, some easy doll dresses and swimsuits.
ENJOY!